Build Your AI Translator With This Next.JS Tutorial
Latest update: 2023-10-16

The Next.js tutorial's preparation phase
First, let’s quickly discuss who is this tutorial for and the basic requirements to complete it successfully.
- We wrote this tutorial with beginners in mind. Intermediate and advanced coders can skip most explanations and push through the code quickly.
- You will need a basic understanding of JavaScript, React,and Next.js.
- You should be familiar with Chakra UI or a similar UI-building component library.
- You will need a ChatGPT 4 API key (or any other model’s key).
Now that you understand your requirements, let’s define our translator (I promise, it will be quick).
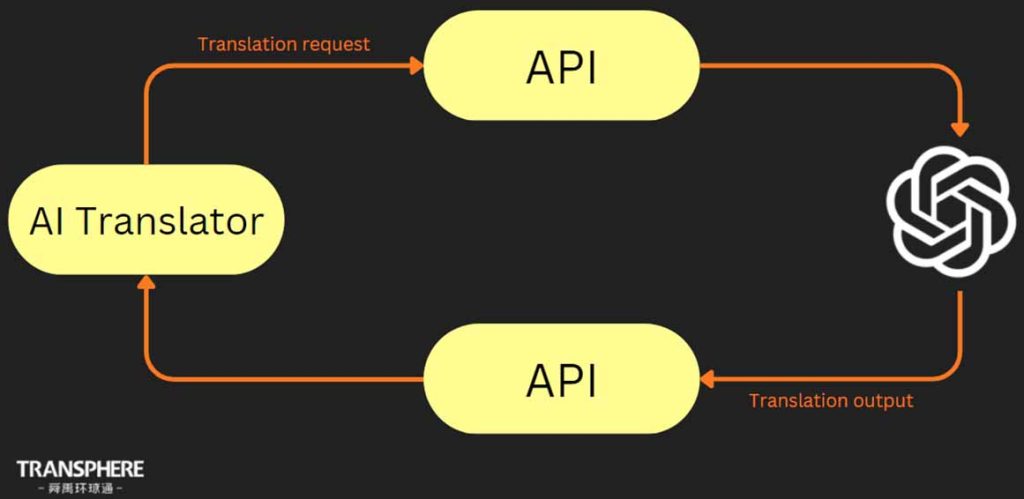
What is an AI translator?
Start building your AI translator
npx create-next-app@latest gpt-translate
					Would you like to use TypeScript? No / Yes
Would you like to use ESLint? No / Yes
Would you like to use Tailwind CSS? No / Yes
Would you like to use `src/` directory? No / Yes
Would you like to use App Router? (recommended) No / Yes
Would you like to customize the default import alias? No / Yes
					cd gpt-translate
npm i @chakra-ui/react @chakra-ui/next-js @emotion/react @emotion/styled framer-motion react-icons react-loader-spinner xlsx dotenv eventsource-parser
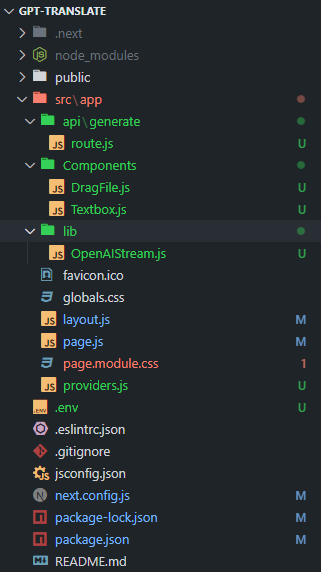
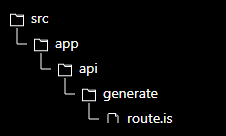
provider.js file in the app directory. Refer to the project structure below.In this Next.js tutorial, we are using the app directory setup for Next.js 13. To use the Chakra UI in the app directory, create a provider.js file in the app directory.
Once created, paste the code below:
					// app/providers.js
'use client'

import { CacheProvider } from '@chakra-ui/next-js'
import { ChakraProvider } from '@chakra-ui/react'

export function Providers({ children }) {
  return (
    <CacheProvider>
      <ChakraProvider>
        {children}
      </ChakraProvider>
    </CacheProvider>
  )
}
<Providers /> and wrapping the children with the same.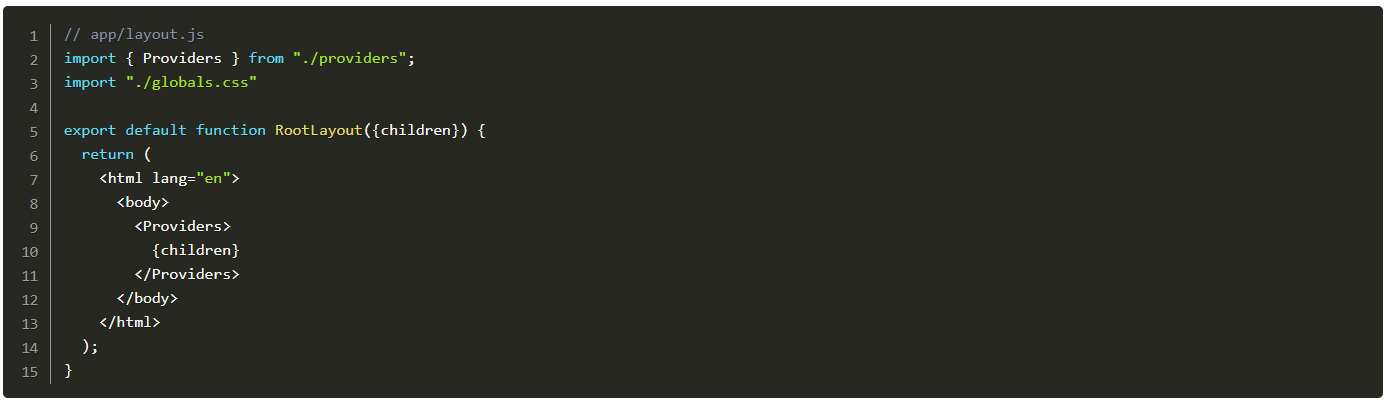
npm run dev to run the application. You should be able to access the app at http://localhost:3000 and see the page below. This shows you are on track so far!
Building the UI of your AI translator
Drag-and-drop feature
-
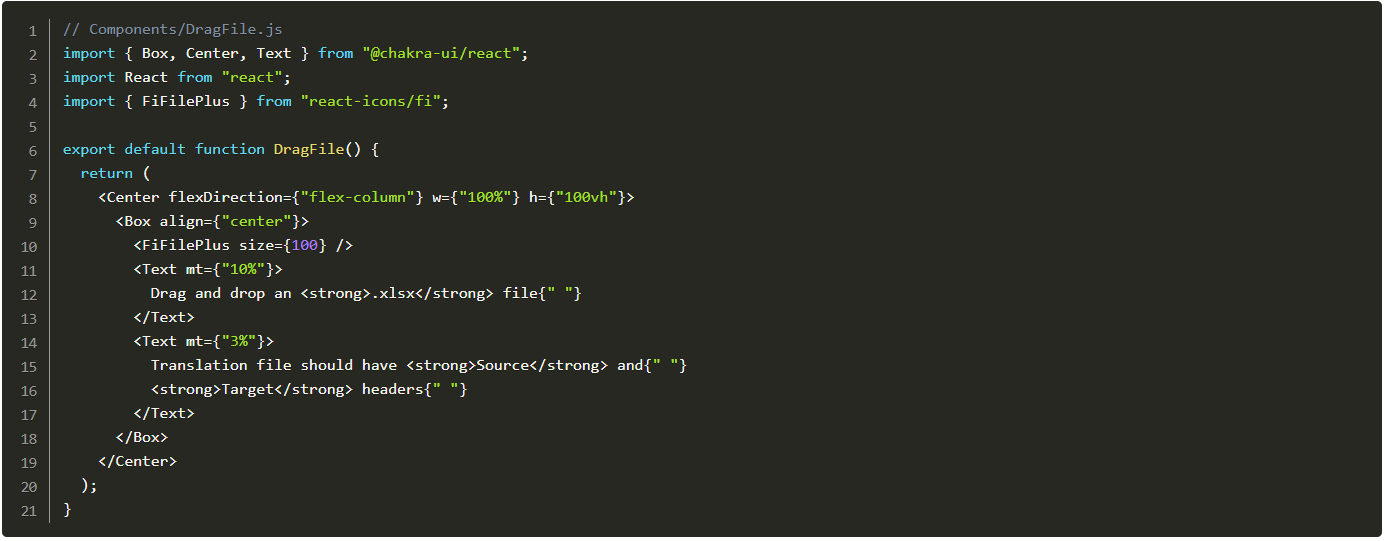
Create a
Componentsfolder in the src directory and inside it createDragFile.js(Drag & drop component)
-
Import the
DragFileintosrc/page.js(Home component) and replace the html with the<DragFile />component.
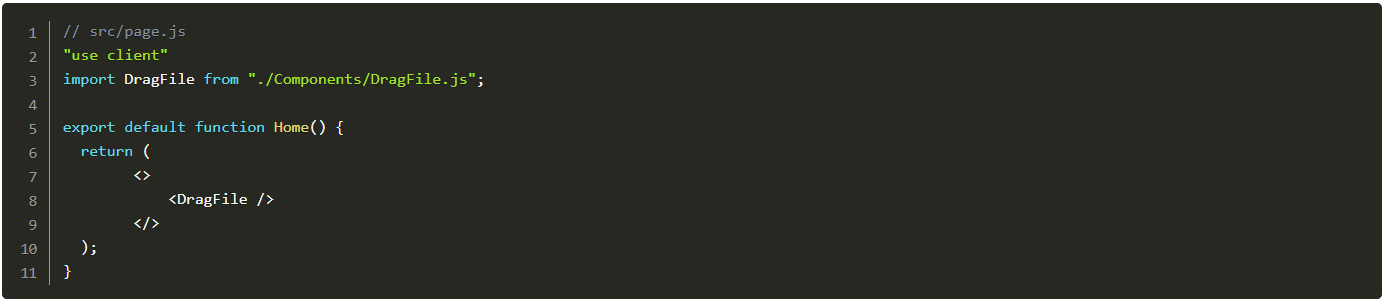
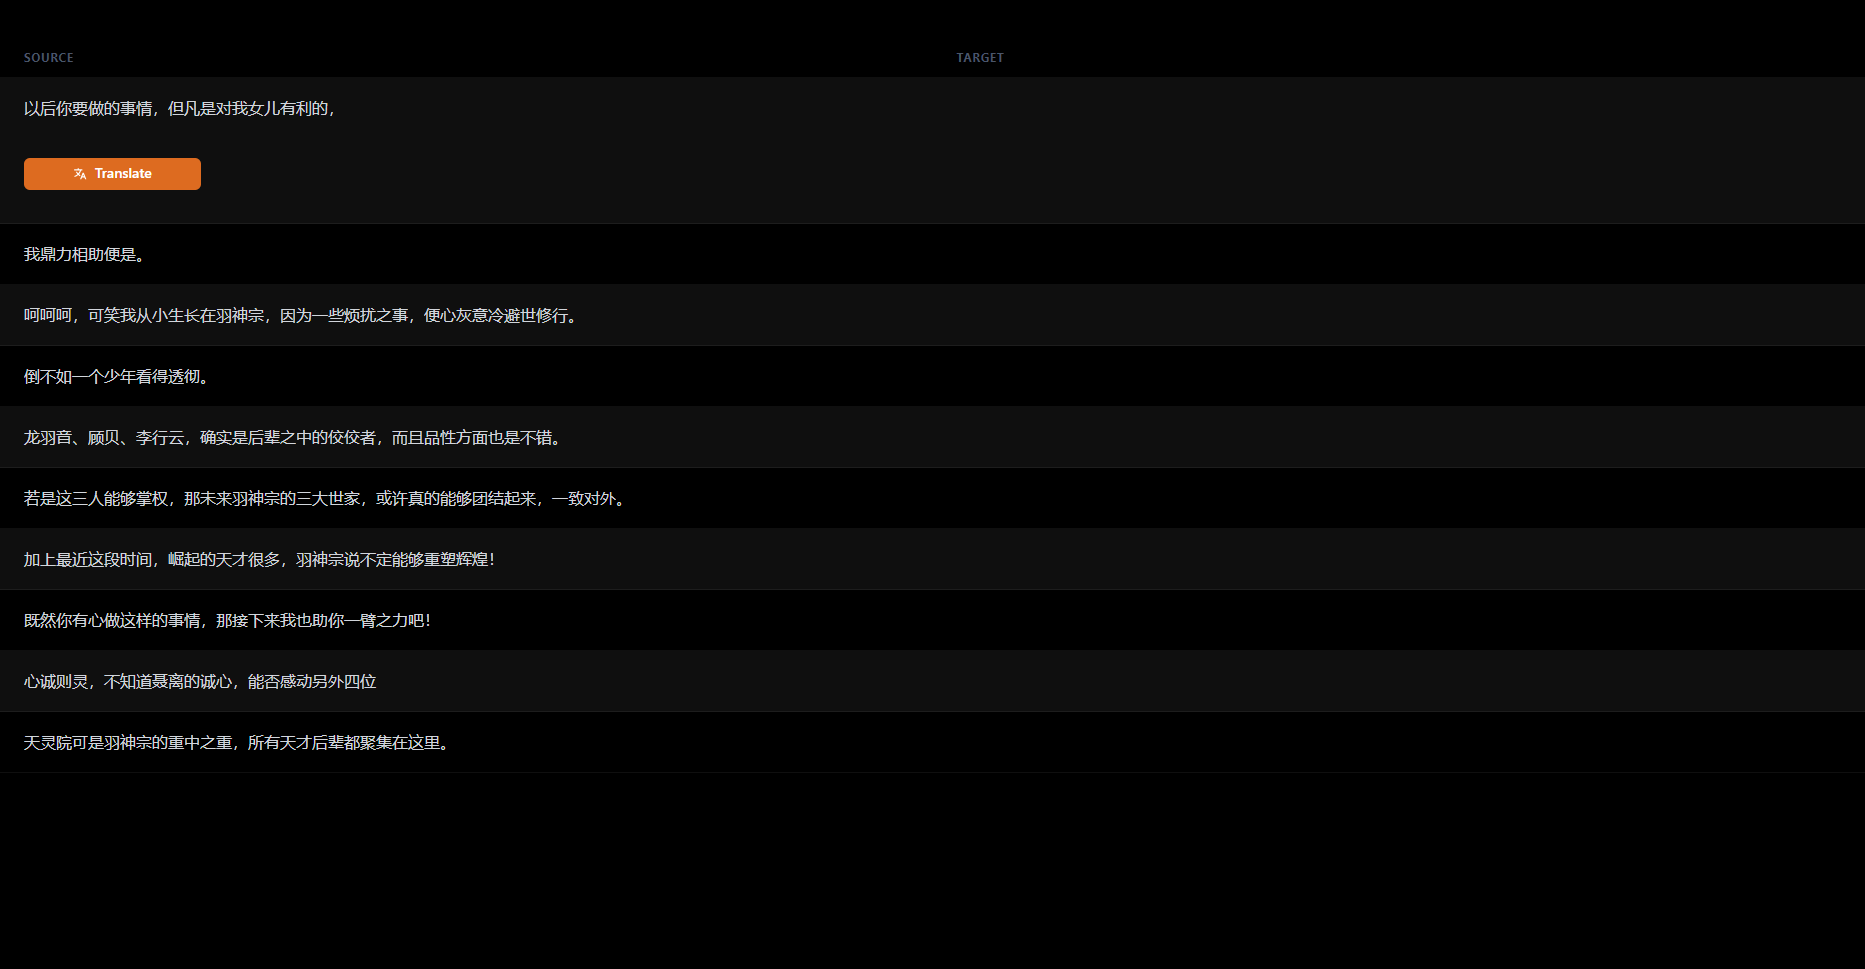
You should end up with this ⬇️

Home component. Below is the code for the onDrag event handler.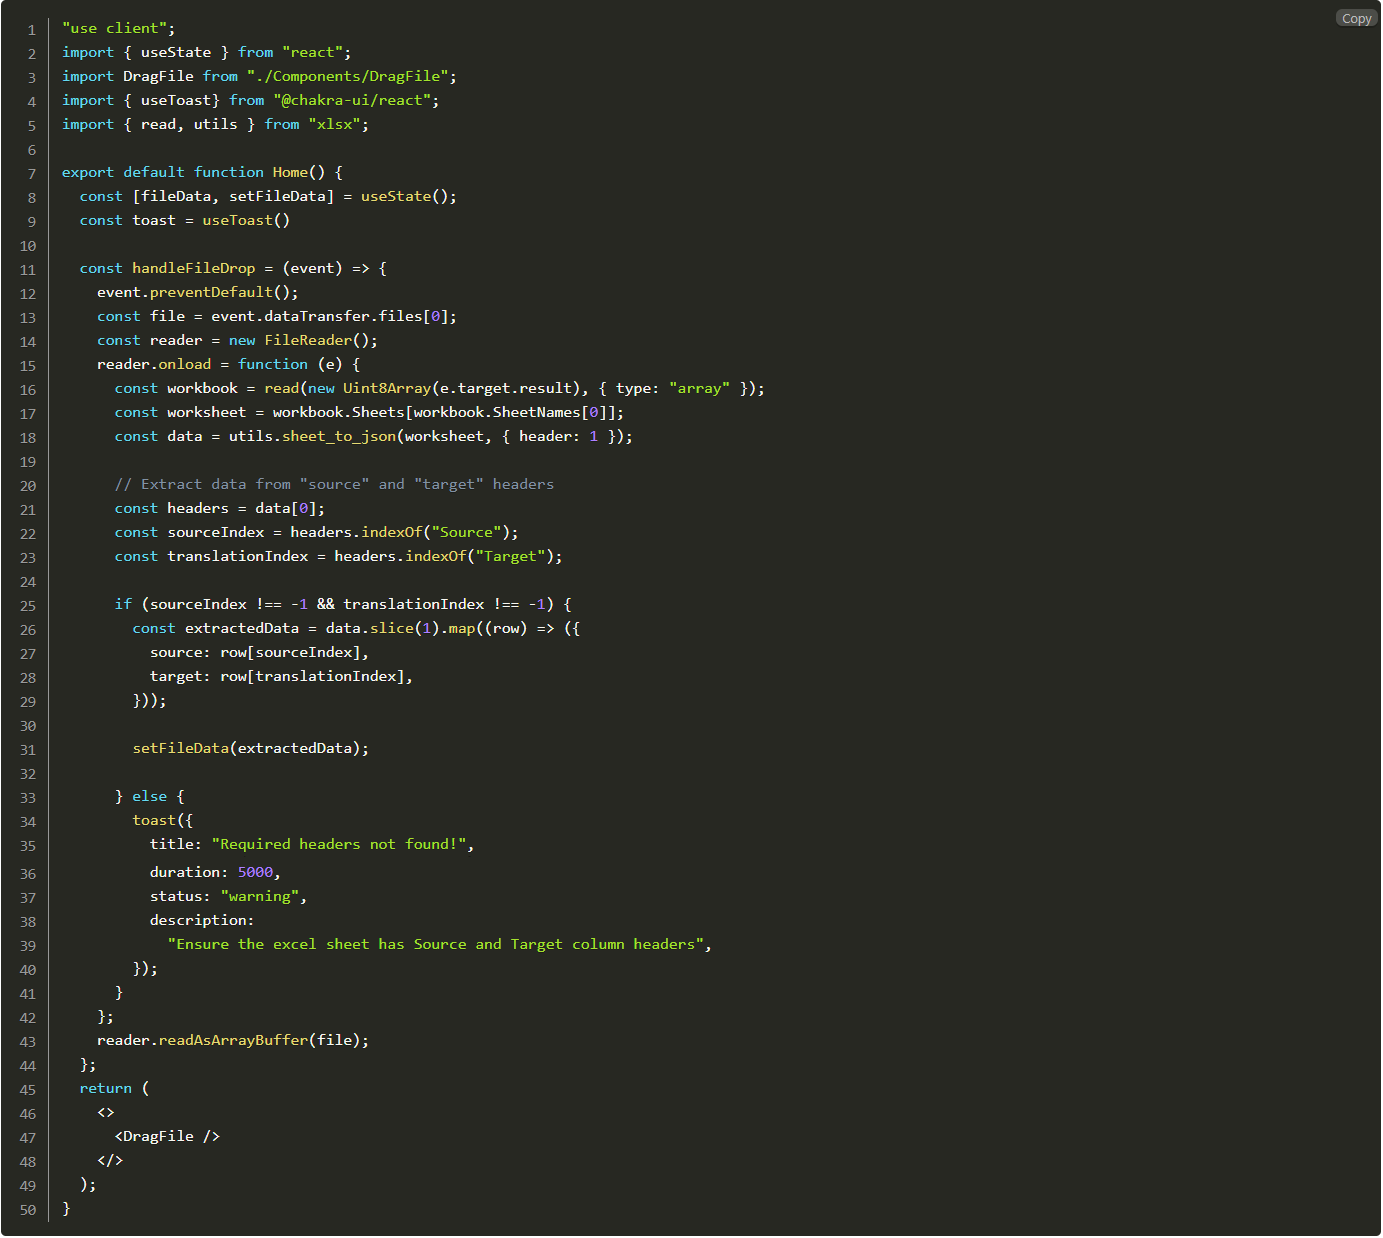
This function does the following:
- It reads the contents of the dropped Excel file.
- It extracts the data from specific headers (Source and Target)
- It updates the state with the extracted data for further use in the AI translator.
- It provides you with feedback in case there is a missing header through a visual toast ➡️

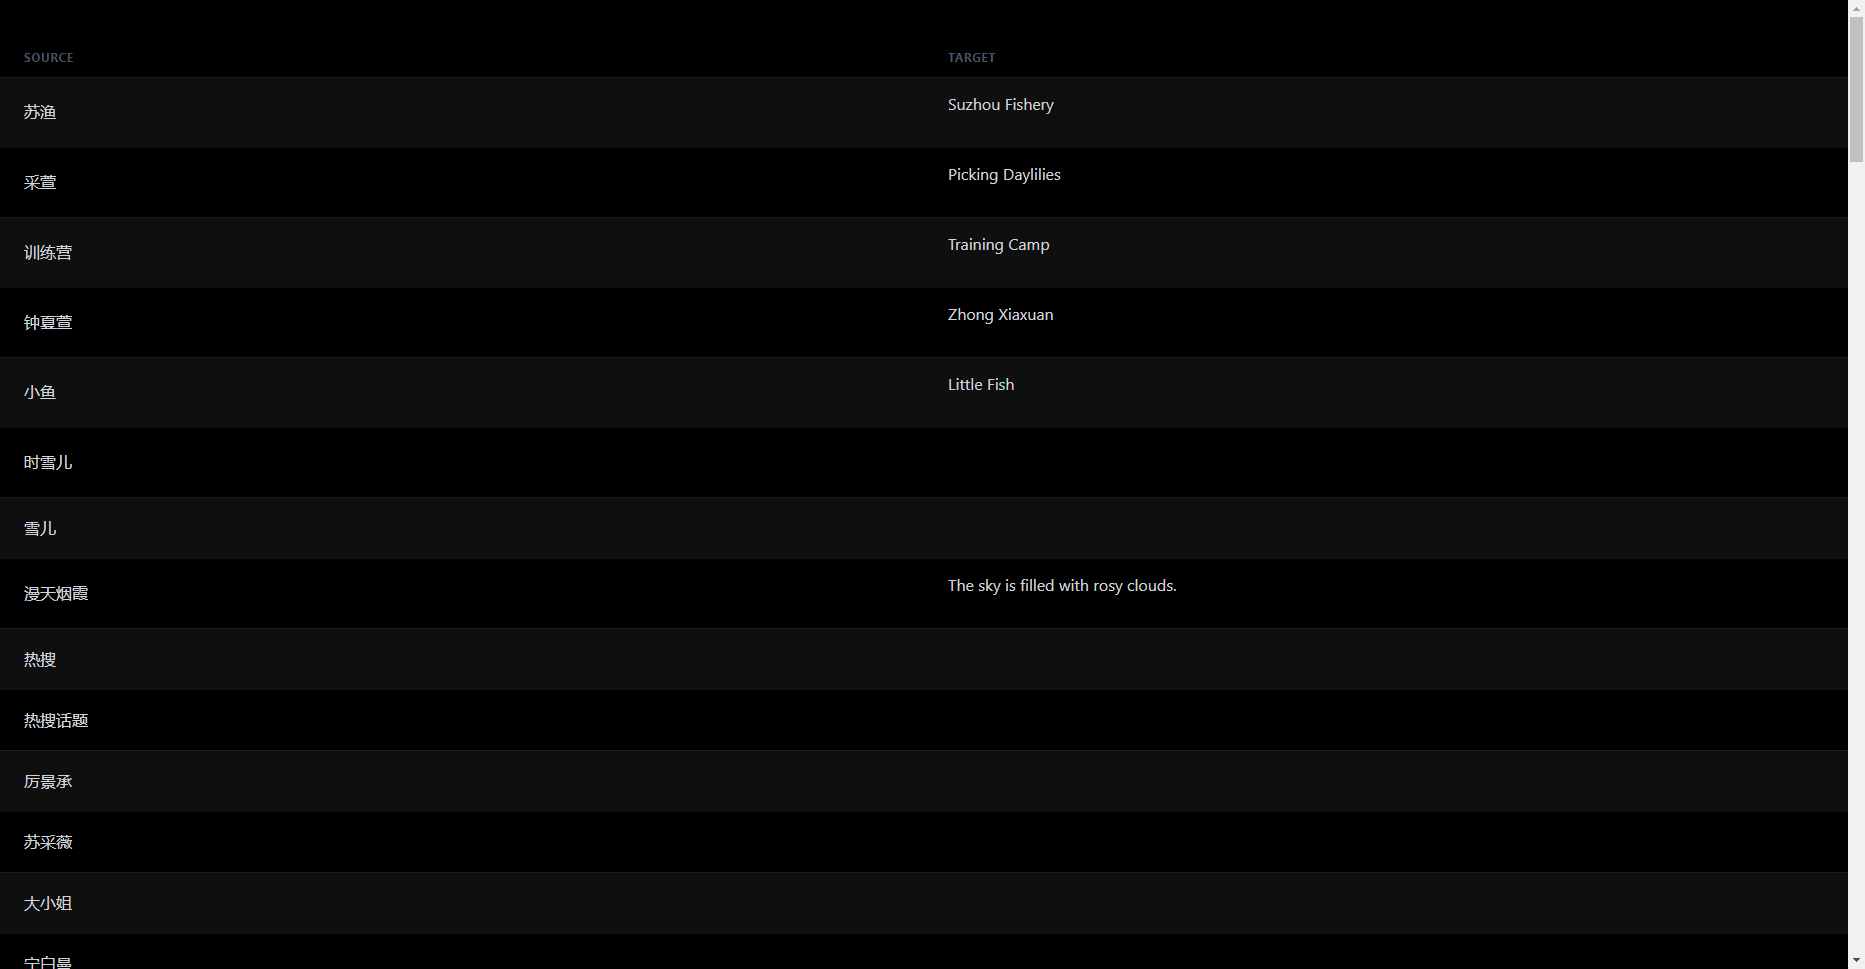
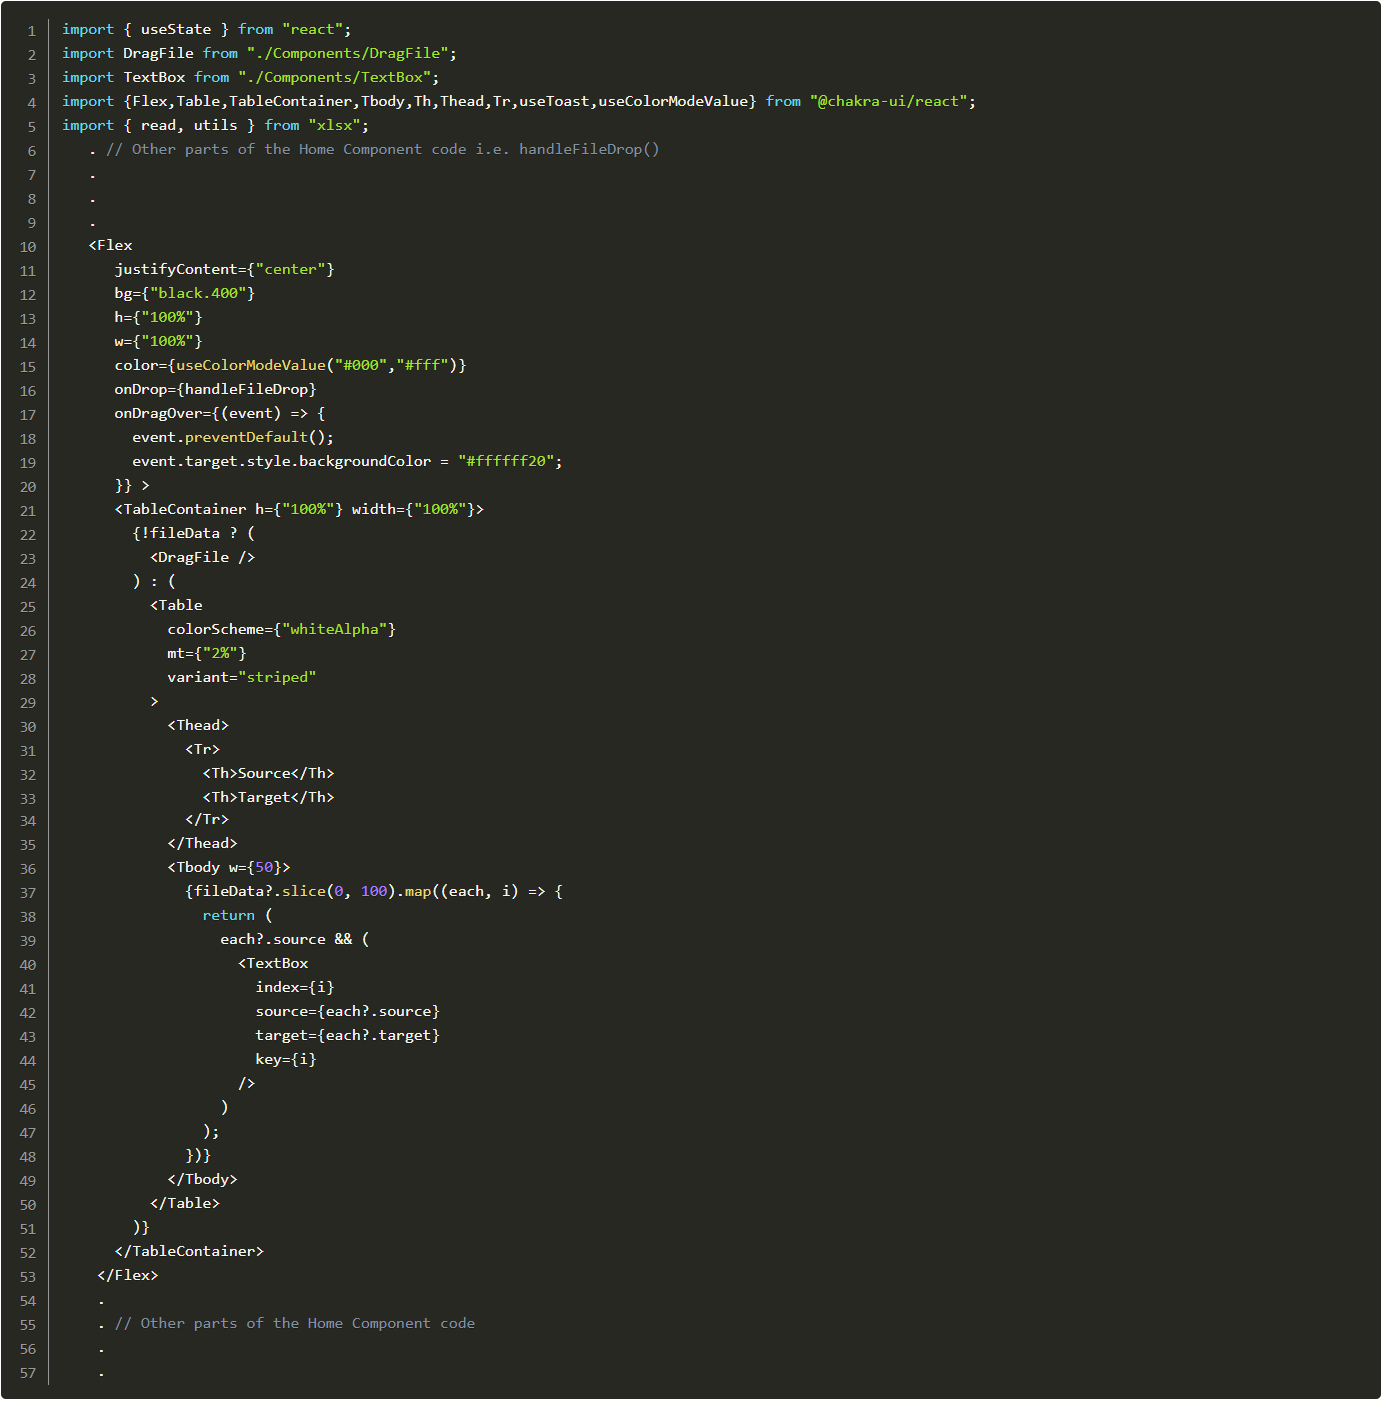
Table component
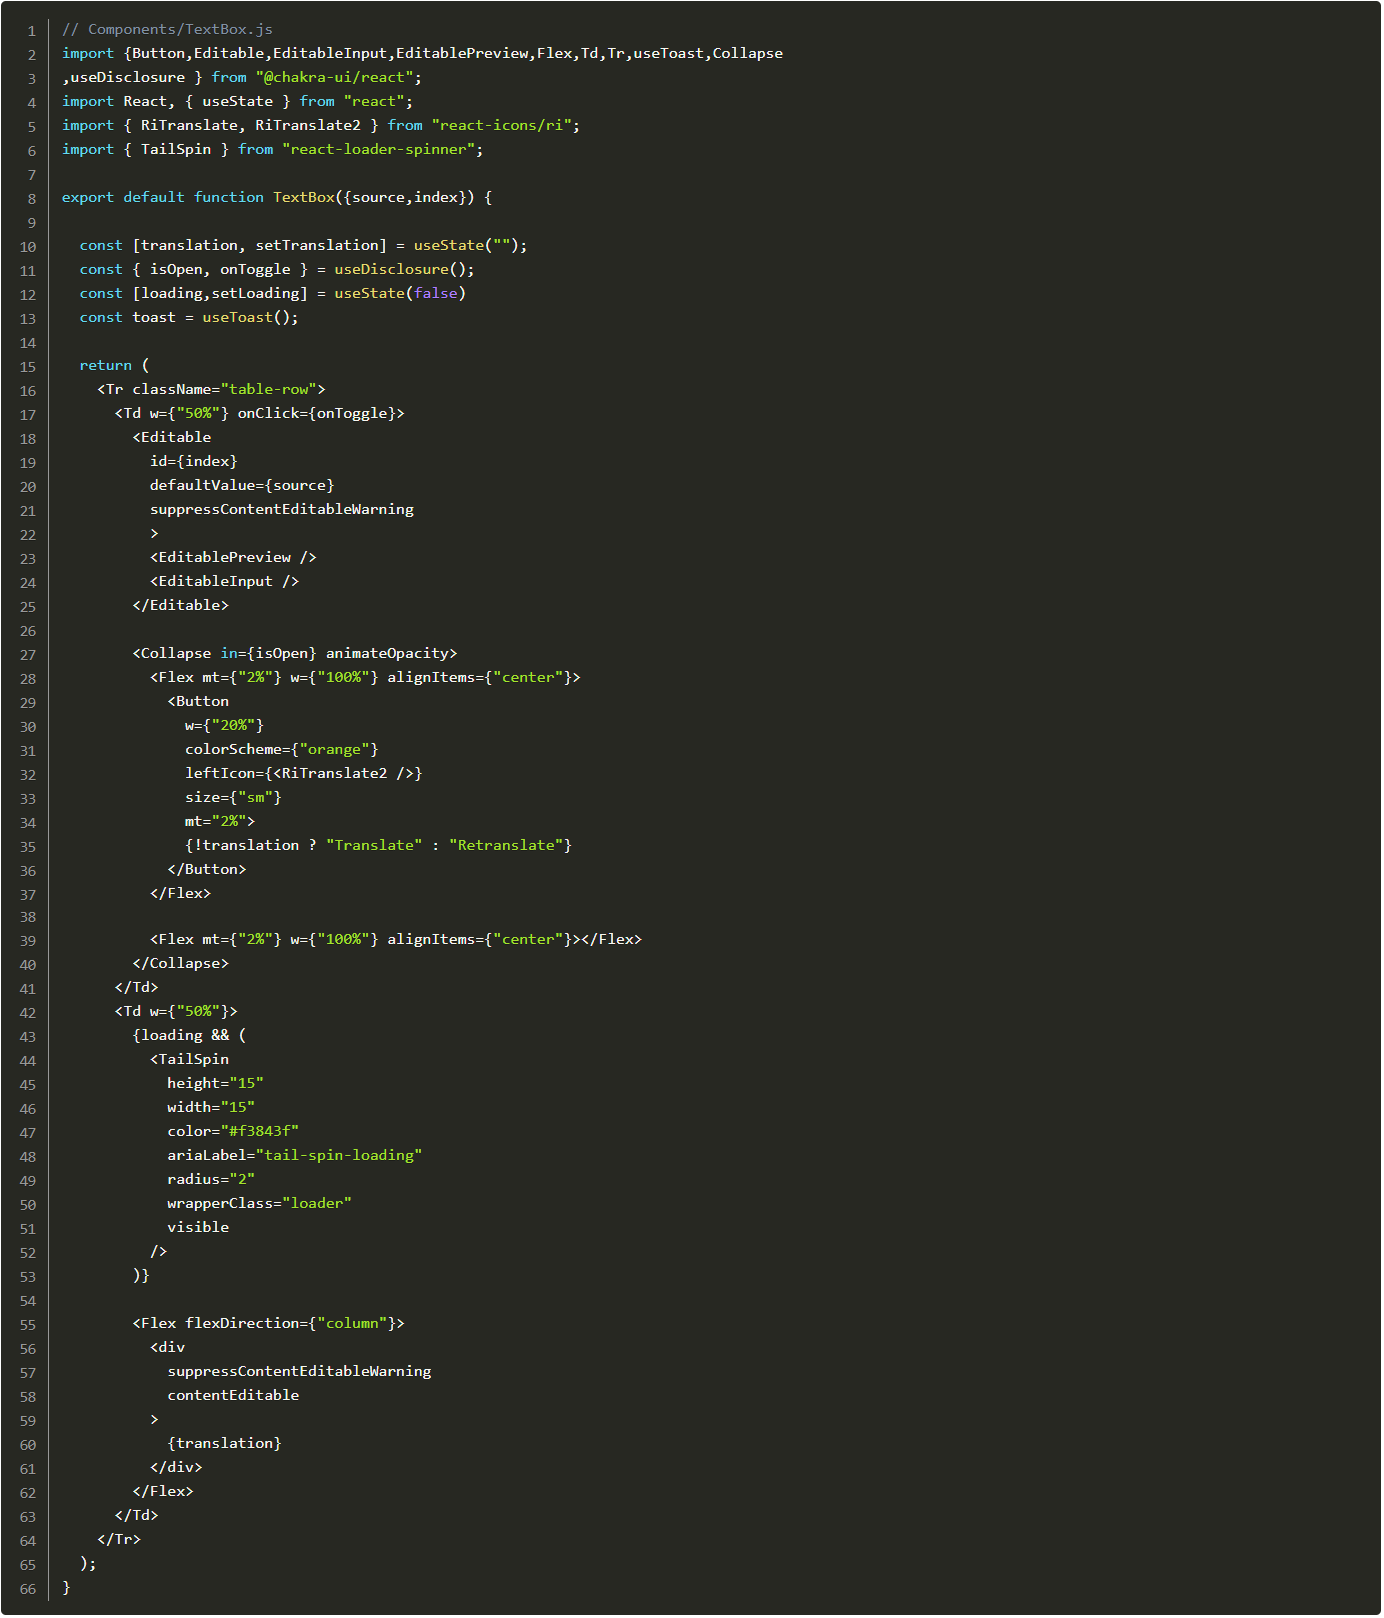
-
Create the Table and map the fileData in the TextBox component.
-
Pass the handleFileDrop function to the onDrop attribute event listener and call event.preventDefault() to prevent the default behavior of the onDragOver event.
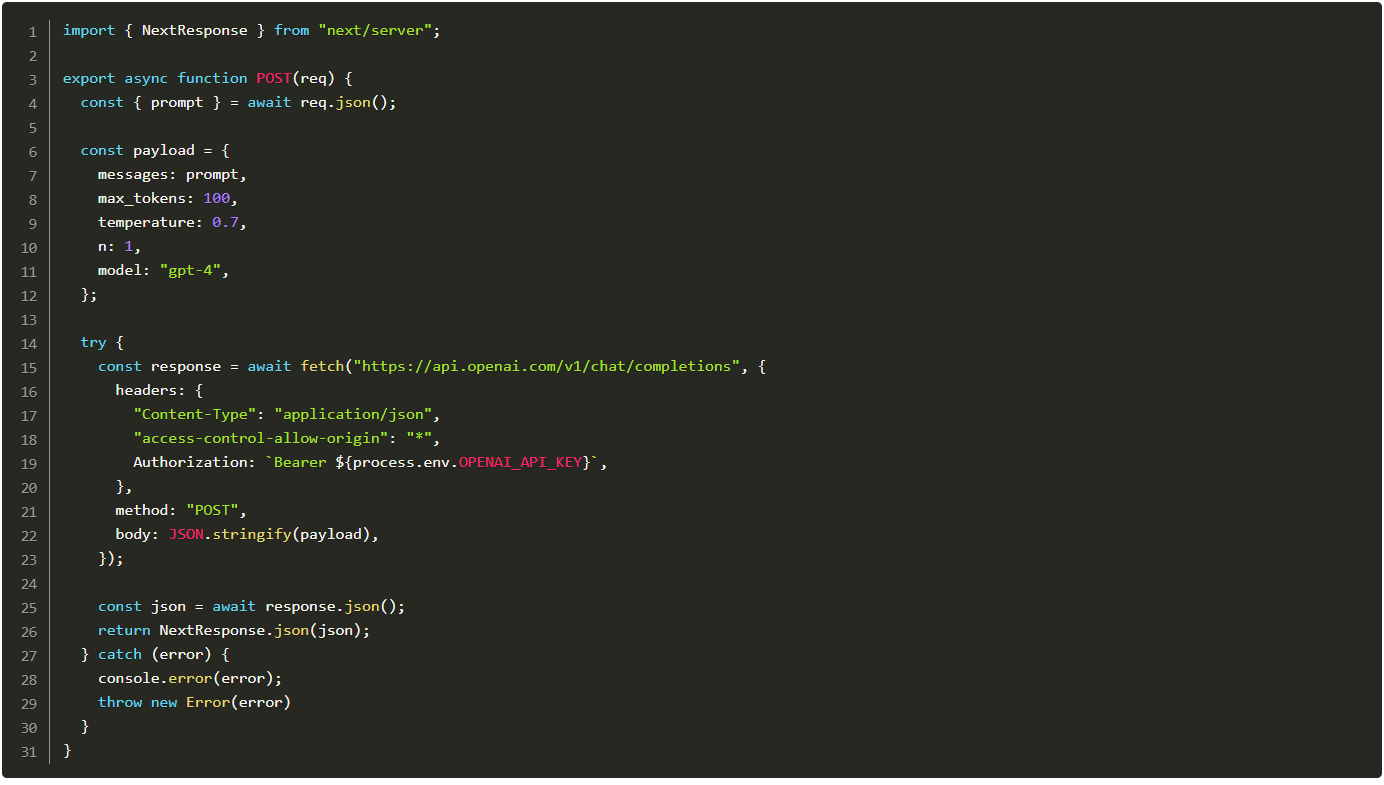
How to integrate Chat Gpt into your AI translator?
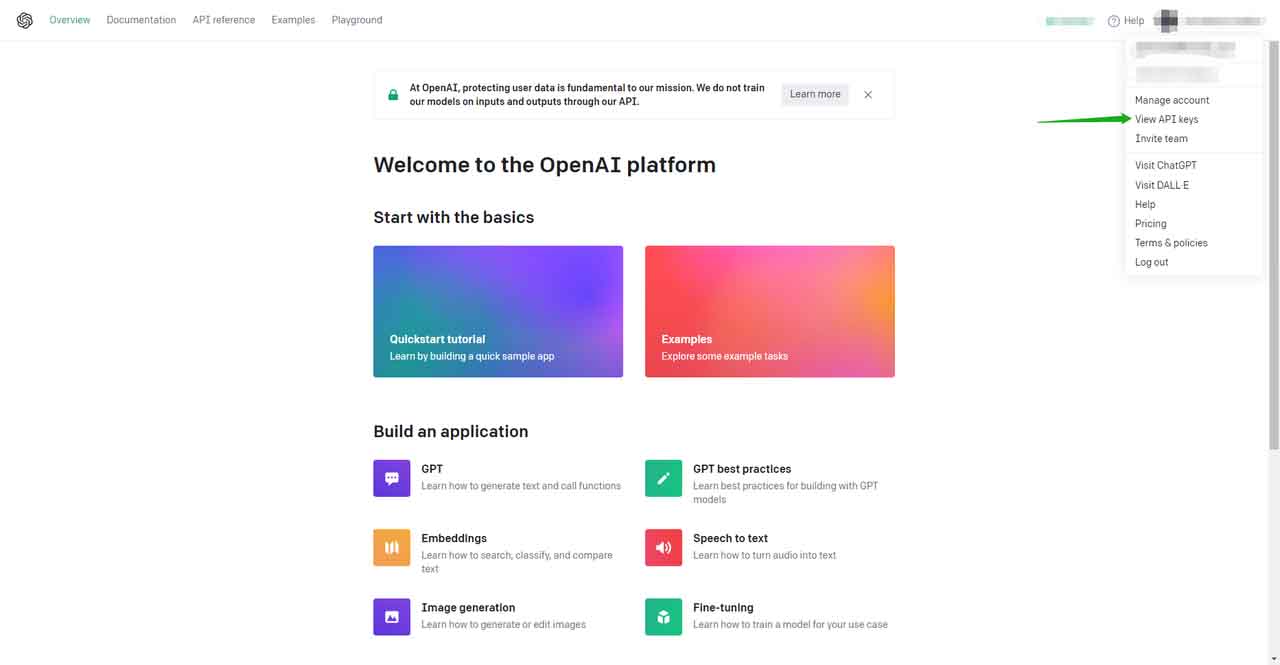
OPENAI_API_KEY = *******📣
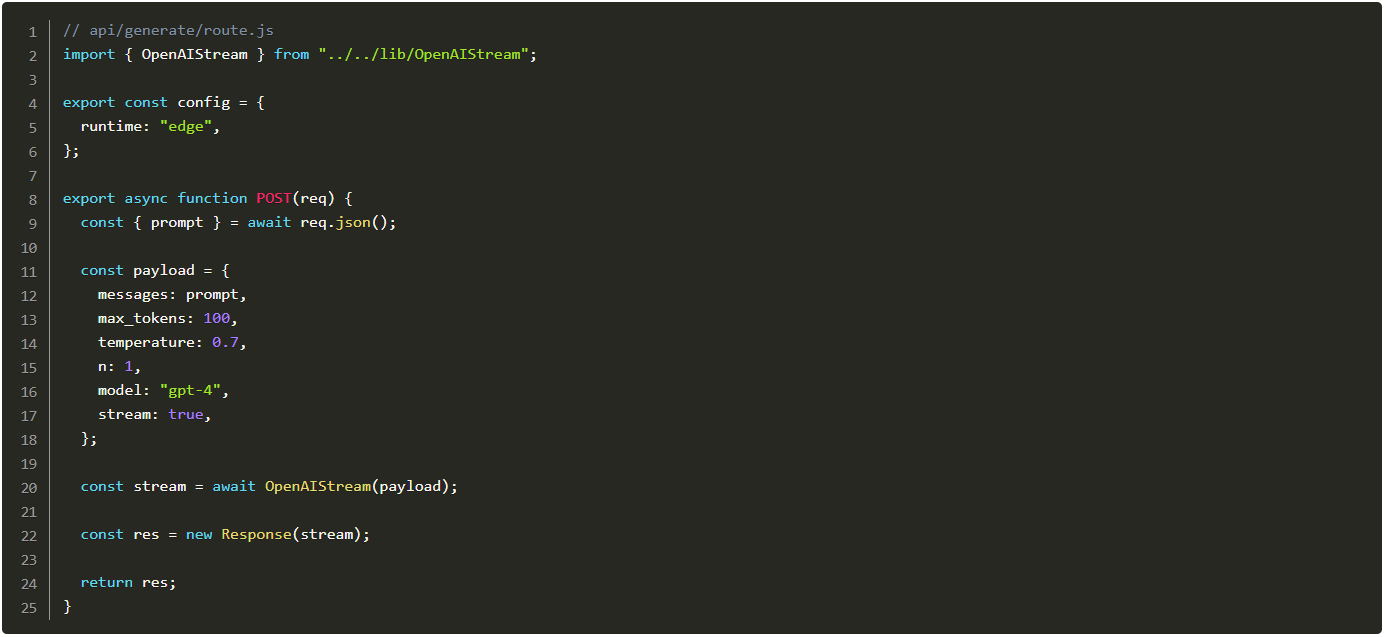
Translation API endpoint
Translation function handler
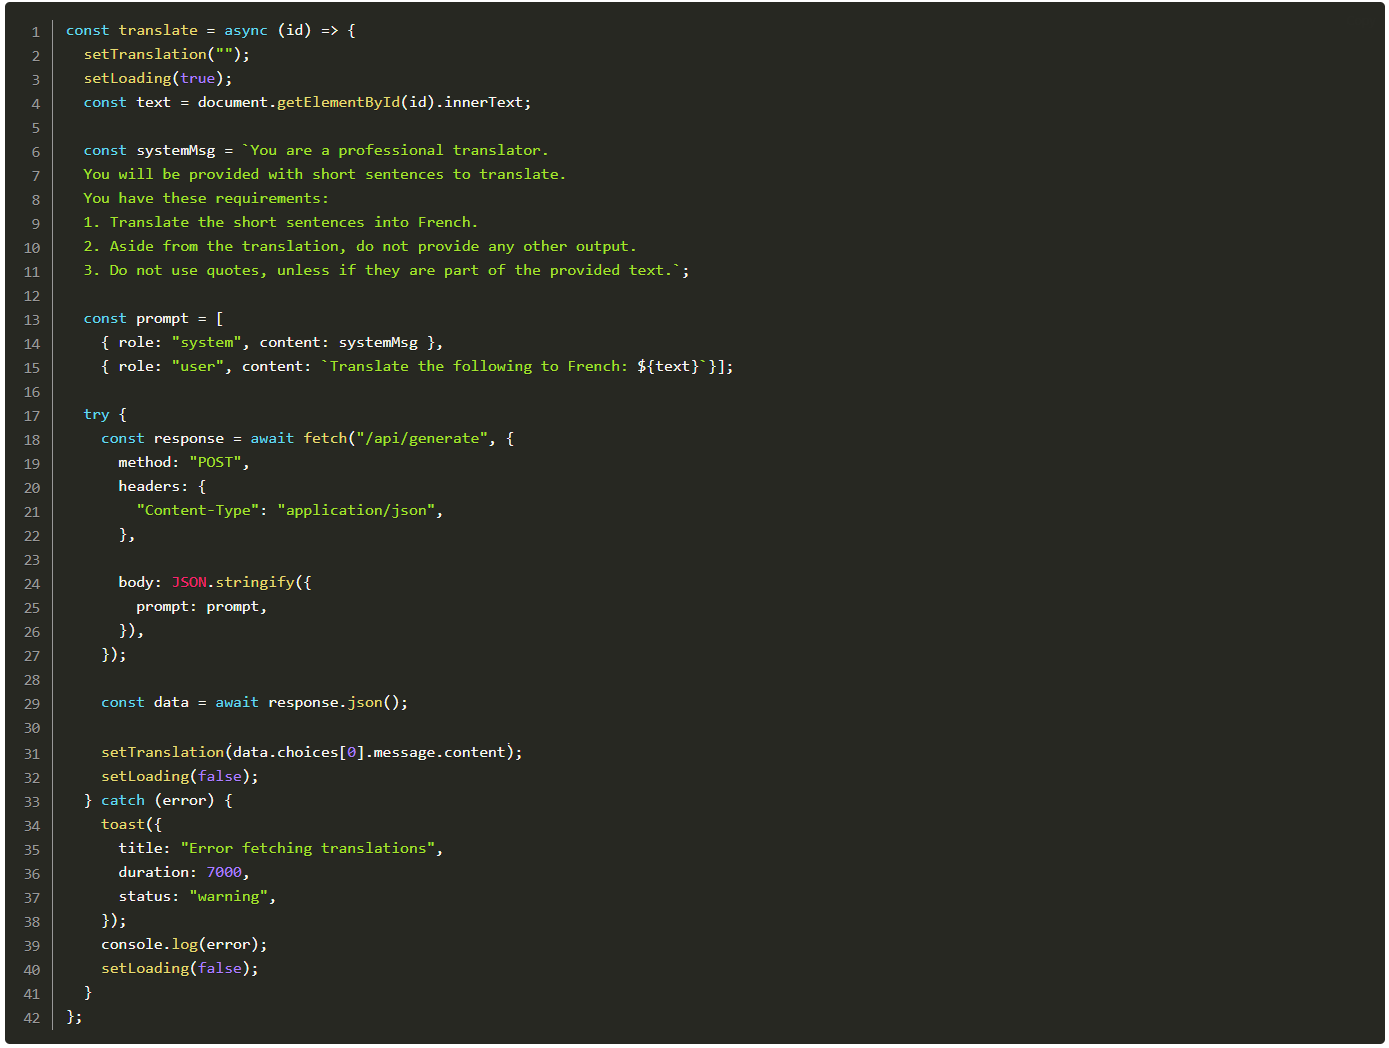
The function takes an id as its argument and uses it to get the innerText of the source table data. Then, it uses it as part of the prompt message that it sends to the /generate endpoint.
Before we move on, let’s look into the systemMsg and prompt variables.
systemMsg – This variable stores GPT’s system message. It is a special type of input used to provide instructions, context, or more information to guide GPT’s response. It helps with the following:
-
- The quality of the output
- It provides context.
- It factilitates continunity.
- It lets you define style and tone.
- It conveys task-specific instructions.
- Avoid undesirable output (specific terms, tone, style, etc.)
- It enhances user experience.
Prompt – This variable stores the ChatGPT prompts. It provides context or instructions for the model’s response.
2. Add the translate function to the onClick event handler on the translate Button in the TextBox component.

With that said, the core application is finally ready to be tested! Go ahead and try it.
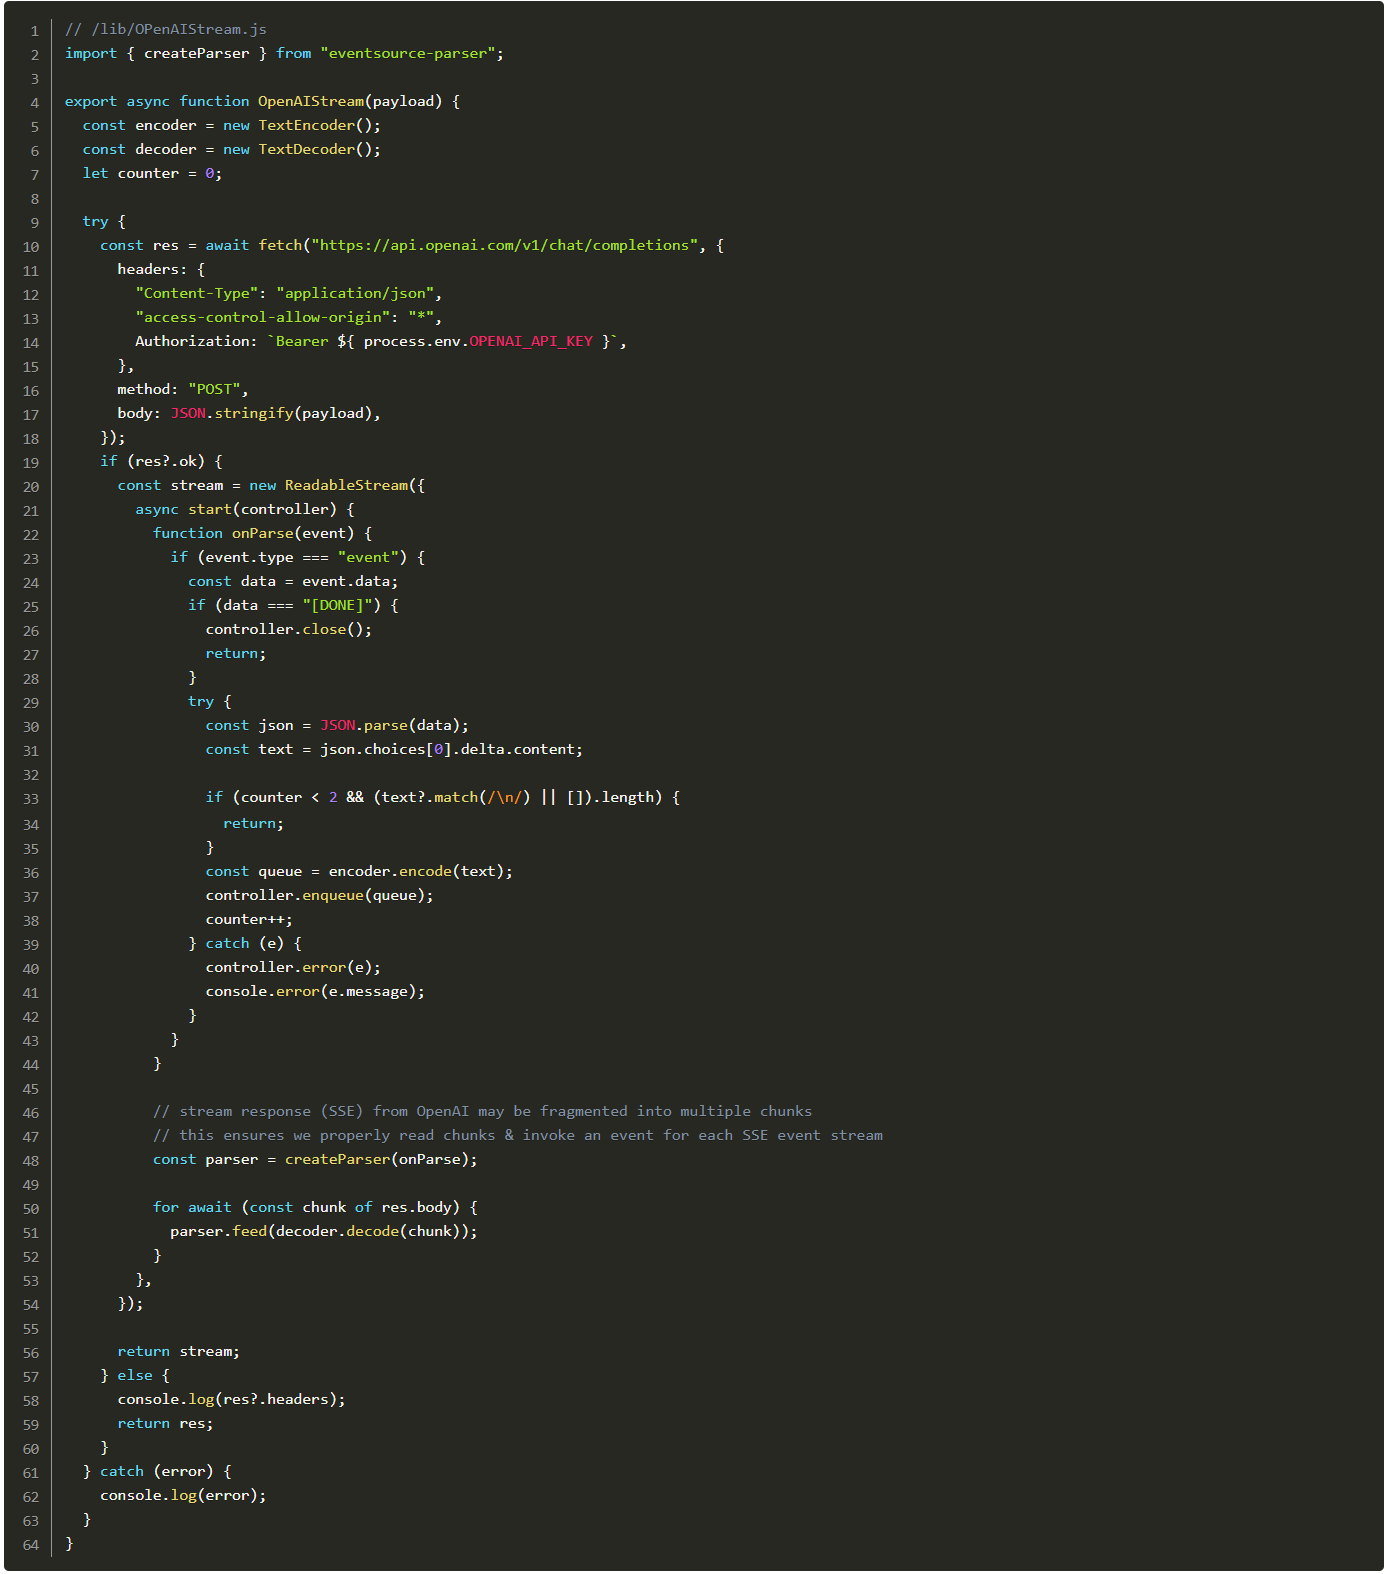
GPT text streaming
-
Create OpenAIStream.js in the lib folder containing the code below.
TextBoxcomponent, the only code that changes is our translate function. Basically, we define a reader using the native web API, getReader(), and progressively add data to our translation state as it’s streamed in.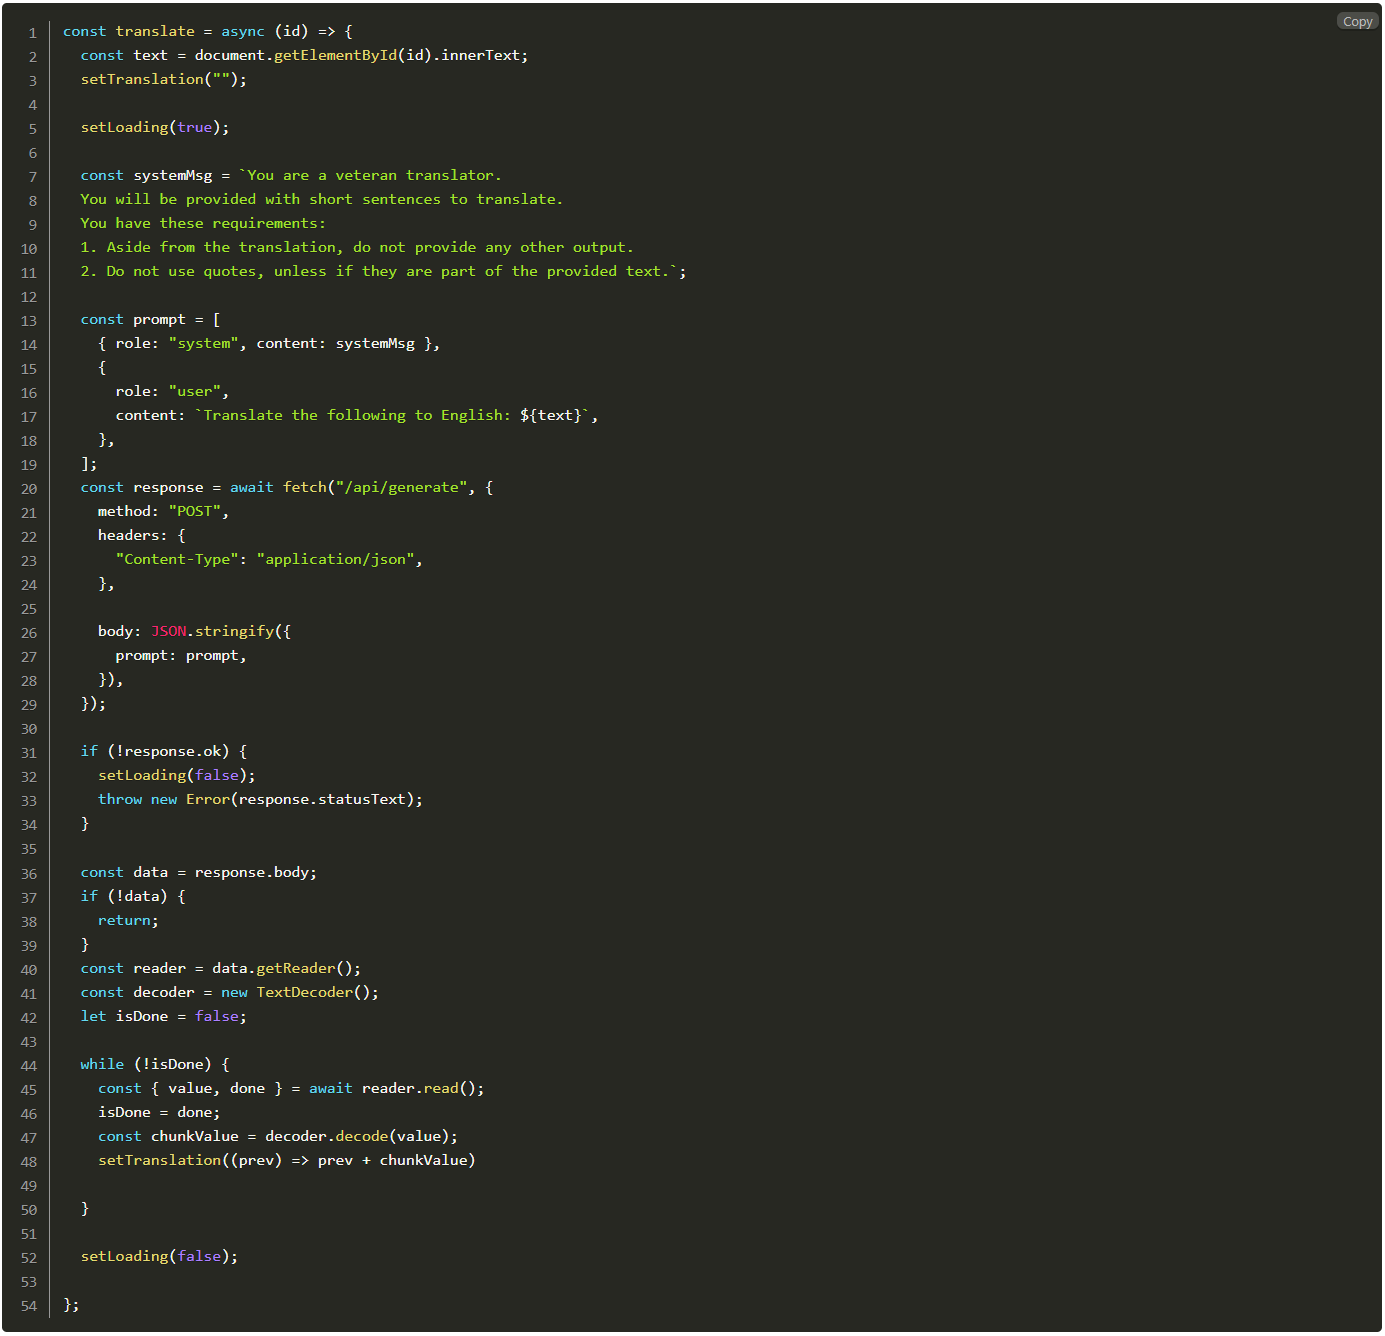
We finally refactored our GPT 4 application to use Edge Functions with streaming. It makes it faster, and it really improves the user experience. Especially for the impatient translators out there.
Try it!
The GPT 4 limits and how to get more out of your AI translator
Now that we have a working AI-powered translation app, how can we truly tap into its potential? As we mentioned above, the system message and the prompt influence GPT’s output to a large degree. It has led to the emergence of a new field known as prompt engineering.
Output formatting
Before designing our system message to the current one, we went through a trial and error phase with GPT-3.5. Our goal/instruction was just to get the translated sentence and nothing more. But, GPT 3.5 was highly unpredictable with its output. Sometimes, we got the output format we instructed, and sometimes we did not.
Let’s look at an example. We used the following prompt:
					   "You are a veteran translator.
    Translate the short sentences into English.
    Output the translated sentence"
Luckily, this issue is easy to fix. A single word improves the output.
					   "You are a veteran translator.
    Translate the short sentences into English.
    Output the translated sentence only"
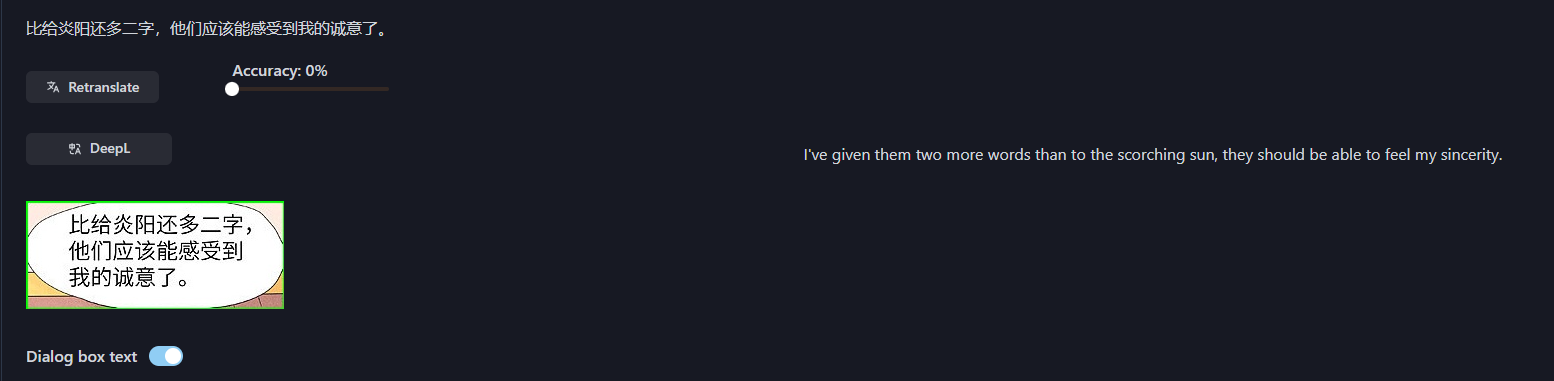
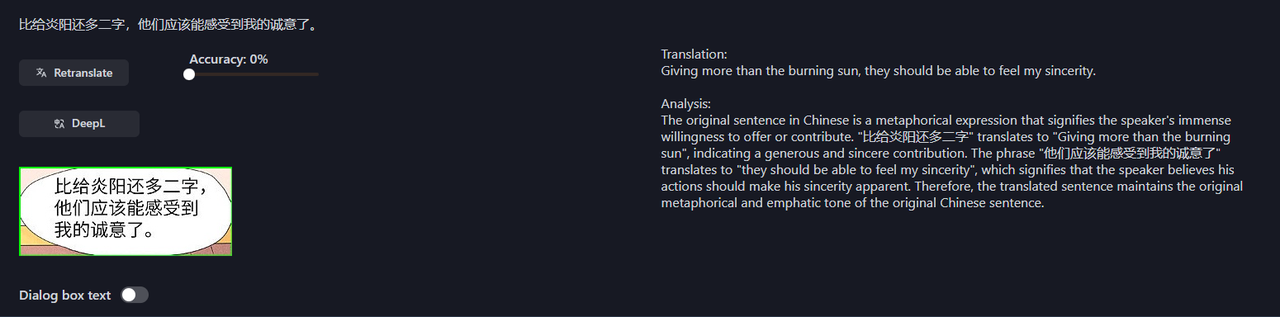
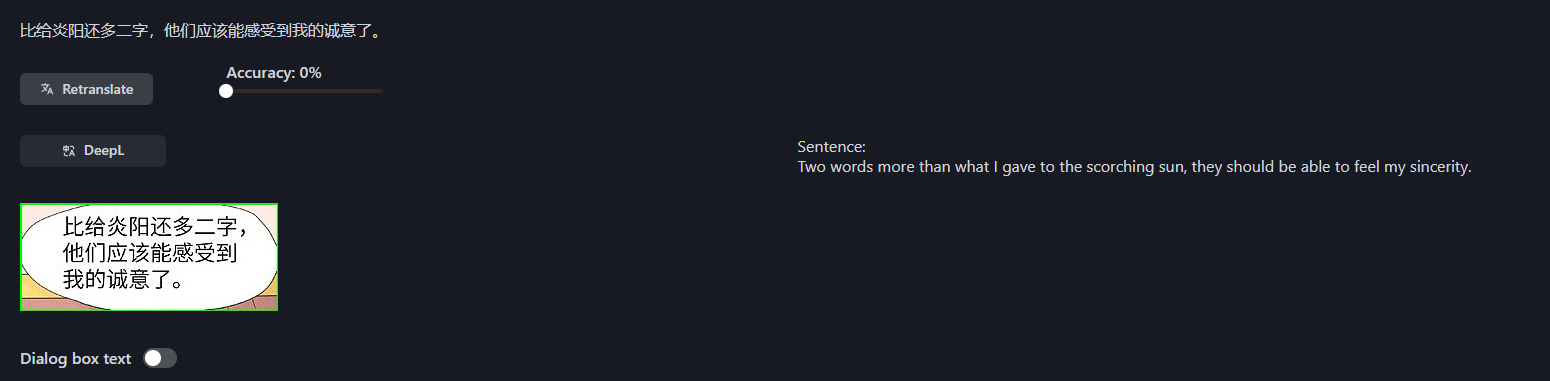
In the following example, we instructed GPT to give an analysis of the translation. In turn, we gained a deeper meaning of the translated sentence.
As you can tell, you can build powerful AI translation applications for your desired use case. Building is just the first step. How you leverage the technology is another.