
How to Easily Implement React Native Localization in 2026

Localizing your mobile app is one of the most reliable ways to grow your install base, lift retention, and reach the roughly 82% of the world that does not speak English as a first language.
With that in mind, we will show you how to build a fully internationalized React Native app from scratch using Expo, react-i18next`, and expo-localization, and then go well beyond the basics into date and number formatting, pluralization, right-to-left (RTL) languages, and a real production workflow.
By the end, you will have a working two-language app with a language switcher, locale-aware formatting, and a clear path to scaling translations across a real team.
TL;DR: Detect the device locale with expo-localization, manage translations with react-i18next, keep your strings in JSON files, format dates and numbers with the built-in Intl API, and handle RTL with React Native’s I18nManager. When you outgrow doing translation by hand, hand the JSON off to professional translators rather than machine-translating and hoping.
Why localization matters
Only about 18% of the world (roughly 1.4 billion people) speaks English, and the majority of them will never use an English-only app. If you ship in one language, you are competing for a sliver of the global market and ignoring the rest.
The business case for localizing is consistent across the industry:
- More installs. Users are far likelier to download an app that appears in their language in the store listing.
- Better retention. An app that feels native in someone’s own language keeps users engaged longer.
- Higher ratings. Apps that respect local language and conventions tend to earn better reviews.
- Less competition. Many non-English markets are far less crowded, so a localized app can stand out quickly.
- Compliance. Some regions legally require digital products to be offered in the local language.
The catch is that localization is more than swapping text. It means adapting date formats, number and currency conventions, pluralization rules, and even reading direction. The good news: with the right setup, most of this is close to automatic. That is what the rest of this guide builds.
Internationalization vs. localization, and how to choose your tools
Two terms get used interchangeably but mean different things:
- Internationalization (i18n) is designing your app so it can support multiple languages and regions, separating translatable text out of your code, preparing for bidirectional text, and avoiding hard-coded formats.
- Localization (l10n) is the act of adapting the app to a specific locale: translating the strings, adjusting formats, and accounting for cultural norms.
You internationalize once; you localize many times, once per target market. For React Native, here are the realistic tool choices:
| Tool | What it does | Best for |
|---|---|---|
| expo-localization | Reads the device's locale, region, currency, and text direction | Detecting the user's preferred language |
| react-i18next | Full translation engine: keys, interpolation, plurals, formatting | The workhorse for most apps, small or large |
| react-intl (FormatJS) | ICU message syntax, strong date/number formatting | Teams already standardized on ICU |
| react-native-localize | Locale detection for bare (non-Expo) React Native | Bare RN projects not using Expo |
| A translation management platform / service | Organizes translation files, manages translators, tracks progress | Larger apps, real translator teams |
This guide uses expo-localization + react-i18next, which is the combination most 2026 guides converge on and the simplest path to a production-ready setup. If you are on bare React Native without Expo, swap expo-localization for react-native-localize, the rest of the approach is identical.
Prerequisites
Before starting, make sure you have:
- A basic understanding of React. If you are new, start with the official React docs.
- Node.js and npm installed. Grab them from nodejs.org.
That is it. Everything else we install as we go.
Step 1: Create the project with Expo
We will use Expo because it gives us a working cross-platform app in one command. Create the project:
npx create-expo-app@latest l10n-app
cd l10n-app
Modern create-expo-app scaffolds a project using Expo Router, a file-based routing system. After creation, your project’s app/ directory looks roughly like this:
l10n-app/
├── app/
│   ├── (tabs)/
│   │   ├── _layout.tsx
│   │   ├── index.tsx        ← the Home tab
│   │   └── explore.tsx
│   ├── _layout.tsx          ← the root layout (app entry point)
│   └── +not-found.tsx
├── assets/
├── components/
├── constants/
├── hooks/
├── package.json
└── ...
The key thing to understand: the root app/_layout.tsx is your app’s entry point, and app/(tabs)/index.tsx is the first screen users see. We will wire localization into the root layout, so it applies everywhere and edit index.tsx for our demo content. This is cleaner than creating a separate parallel screen, we work with the template instead of bolting onto it.
Start the app to confirm it runs:
npx expo startPress “w” to open it in a web browser or scan the QR code with the Expo Go app on your phone. You should see the default starter screen.
Step 2: Build a simple Home screen
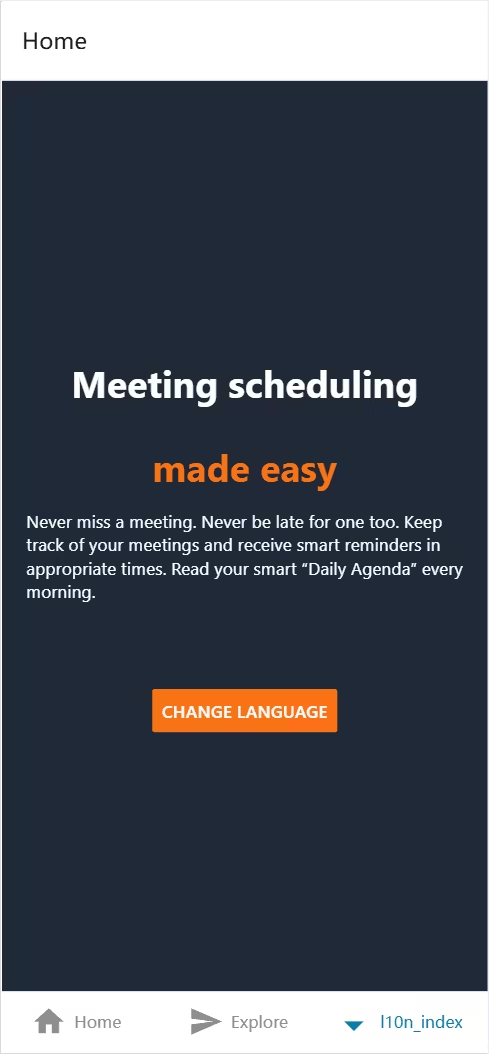
Let’s replace the default home screen with a small “meeting scheduler” landing page so we have real text to localize. Open app/(tabs)/index.tsx and replace its contents:
import { Button, StyleSheet, Text, View } from 'react-native';
import { useRouter } from 'expo-router';

export default function Home() {
  const router = useRouter();

  return (
    <View style={styles.<container}>
      <Text style={{ ...styles.<text, color: '#fff' }}>
        Meeting scheduling
      </Text>
      <Text style={{ ...styles.<text, color: '#f97316' }}>
        made easy
      </Text>
      <Text style={{ ...styles.<body, color: '#fff' }}>
        Never miss a meeting. Never be late for one too. Keep track of your
        meetings and receive smart reminders at appropriate times. Read your
        smart "Daily Agenda" every morning.
      </Text>
      <Button
        color={'#f97316'}
        title="Change Language"
        onPress={() => router.<push('/languages')}
      />
    </View>
  );
}

const styles = StyleSheet.<create({
  container: {
    flex: 1,
    backgroundColor: '#1f2937',
    alignItems: 'center',
    justifyContent: 'center',
    padding: '5%',
  },
  text: { fontSize: 30, fontWeight: 'bold', padding: '4%' },
  body: { fontSize: 14, fontWeight: 'normal', marginBottom: '20%' },
});
Right now, every string is hard coded in English. That is exactly what we are about to fix, in Step 6 these literal strings get replaced with translation keys, so don’t worry that they’re inline for now; this is just our starting point.
Step 3: Install the localization libraries
Stop the dev server (Ctrl-C) and install the translation engine plus Expo’s locale detector:
npm install react-i18next i18next
npx expo install expo-localization
What each does:
- i18next is the underlying internationalization framework for JavaScript. It handles loading translations, interpolation, pluralization, and formatting.
- react-i18next is the React/React Native binding layer, hooks and components that make i18next ergonomic in components.
- expo-localization reads the device’s locale settings so we can auto-select the user’s language on first launch.
Step 4: Set up translation files
Hard-coding translations inside your config quickly becomes unmanageable. The production-friendly approach (and the format professional translators expect) is one JSON file per language. Create a locales/ folder in your project root:
l10n-app/
├── locales/
│   ├── en-US.json
│   └── zh-CN.json
└── ...
locales/en-US.json:
{
  "home_title_1": "Meeting scheduling",
  "home_title_2": "made easy",
  "header_title_home": "Home",
  "header_title_lang": "Change Language",
  "home_button_text": "Change Language",
  "home_body": "Never miss a meeting. Never be late for one too. Keep track of your meetings and receive smart reminders at appropriate times. Read your smart "Daily Agenda" every morning."
}
locales/zh-CN.json:
{
  "home_title_1": "会议安排",
  "home_title_2": "变得容易",
  "header_title_home": "主页",
  "header_title_lang": "改变语言",
  "home_button_text": "改变语言",
  "home_body": "永远不要错过会议。也不要迟到。跟踪您的会议并在适当的时间收到智能提醒。每天早上阅读您的智能"每日议程"。
}
Keeping translations in plain JSON means a translator can edit them without ever touching your code, and you can later sync them to a translation platform automatically.
Step 5: Configure i18next
Create i18n.js in your project root. This file wires up i18next, detects the device language, and registers our two translation files:
import i18n from 'i18next';
import { getLocales } from 'expo-localization';
import { initReactI18next } from 'react-i18next';

import en from './locales/en-US.json';
import zh from './locales/zh-CN.json';

// A language-detection plugin that reads the device's preferred locale.
// On modern Expo, getLocales() returns structured locale objects, and the
// first entry is the user's top preference (e.g. { languageTag: "en-US" }).
const languageDetector = {
  type: 'languageDetector',
  async: true,
  detect: (callback) => {
    const locales = getLocales();
    const languageTag = locales[0]?.<languageTag ?? 'en-US';
    callback(languageTag);
  },
  init: () => {},
  cacheUserLanguage: () => {},
};

i18n
  .<use(initReactI18next) // passes the i18n instance down to react-i18next
  .<use(languageDetector)
  .<init({
    fallbackLng: 'en-US',
    resources: {
      'en-US': { translation: en },
      'zh-CN': { translation: zh },
    },
    // supportedLngs powers our language switcher screen later: it is the
    // list of languages the app advertises to the user.
    supportedLngs: ['en-US', 'zh-CN'],
    interpolation: {
      escapeValue: false, // React already escapes output, so this is safe
    },
  });

export default i18n;
A few things worth understanding rather than copy-pasting blindly:
- The language detector runs once at startup. It asks expo-localization for the device’s locales and hands the top one to i18next. If the device language is not supported, fallbackLng (en-US) kicks in. Note that we read the newer getLocales() API rather than the older Localization.locale string, because it returns richer, structured data (language tag, region, currency, text direction).
- Modern plural handling is the default. Since i18next v21, pluralization uses the CLDR-aligned _one / _other suffixes we rely on later — you do not need to configure anything to get it. The compatibilityJSON option only exists to opt *back* into the legacy v3/v2 formats, so we simply leave it out. (See the next point for one React Native caveat.)
- You will likely need an Intl polyfill. i18next’s modern plurals are built on Intl.PluralRules, and the Intl formatting in Step 10 relies on the broader Intl API. Recent React Native (Hermes) ships these, but on older engines they may be missing, in which case i18next silently falls back to legacy plural handling and your Intl.NumberFormat calls misbehave. If you support older devices, add a polyfill such as intl-pluralrules and @formatjs/intl-numberformat, imported once at app startup.
- supportedLngs is the canonical list of languages your app offers. We will read it back when building the language switcher.
Step 6: Internationalize the app
Now we replace hard-coded strings with translation keys. The pattern is always the same: pull the “t” function from the useTranslation hook, then wrap each string as t(‘key’).
First, wrap the whole app with the i18next provider. Open the root app/_layout.tsx. Because a component can’t consume a context it renders itself, we split the navigation into a small inner component so it sits inside the provider and can use the useTranslation hook, that way the header title re-translates when the user switches language:
import { Stack } from 'expo-router';
import { I18nextProvider, useTranslation } from 'react-i18next';
import i18n from '../i18n';

function RootNavigator() {
  const { t } = useTranslation();
  return (
    <Stack>
      <Stack.Screen name="(tabs)" options={{ headerShown: false }} />
      <Stack.Screen name="languages" options={{ title: t('header_title_lang') }} />
    </Stack>
  );
}

export default function RootLayout() {
  return (
    <I18nextProvider i18n={i18n}>
      <RootNavigator />
    </I18nextProvider>
  );
}
Then update app/(tabs)/index.tsx to use the “t” function:
import { Button, StyleSheet, Text, View } from 'react-native';
import { useRouter } from 'expo-router';
import { useTranslation } from 'react-i18next';

export default function Home() {
  const router = useRouter();
  const { t } = useTranslation();

  return (
    <View style={styles.<container}>
      <Text style={{ ...styles.<text, color: '#fff' }}>{t('home_title_1')}</Text>
      <Text style={{ ...styles.<text, color: '#f97316' }}>{t('home_title_2')}</Text>
      <Text style={{ ...styles.<body, color: '#fff' }}>{t('home_body')}</Text>
      <Button
        color={'#f97316'}
        title={t('home_button_text')}
        onPress={() => router.<push('/languages')}
      />
    </View>
  );
}

const styles = StyleSheet.<create({
  container: {
    flex: 1,
    backgroundColor: '#1f2937',
    alignItems: 'center',
    justifyContent: 'center',
    padding: '5%',
  },
  text: { fontSize: 30, fontWeight: 'bold', padding: '4%' },
  body: { fontSize: 14, fontWeight: 'normal', marginBottom: '20%' },
});
Step 7: Add a language switcher
Create app/languages.tsx (a screen that lists supported languages and switches between them on tap):
import { FlatList, StyleSheet, Text, TouchableOpacity, View } from 'react-native';
import { useTranslation } from 'react-i18next';

const LANGUAGE_NAMES = {
  'en-US': 'English',
  'zh-CN': 'Chinese (Simplified)',
};

export default function Languages() {
  const { i18n } = useTranslation();
  // supportedLngs comes from our i18n config. i18next appends a special
  // "cimode" entry, so we filter it out before rendering.
  const languages = (i18n.<options.<supportedLngs || []).<filter(
    (code) => code !== 'cimode'
  );

  return (
    <View style={styles.<container}>
      <FlatList
        data={languages}
        keyExtractor={(item) => item}
        renderItem={({ item }) => (
          <TouchableOpacity
            onPress={() => i18n.<changeLanguage(item)}
            style={styles.<listItem}
          >
            <Text>{LANGUAGE_NAMES[item] ?? item}</Text>
          </TouchableOpacity>
        )}
      />
    </View>
  );
}

const styles = StyleSheet.<create({
  container: { flex: 1, backgroundColor: '#fff' },
  listItem: { padding: '4%', width: '100%', borderBottomWidth: 1 },
});
Calling i18n.changeLanguage(code) re-renders every component using t(), so the whole UI flips language instantly.

At this point you have a working, switchable, two-language app. Everything from here makes it production-grade.
Step 8: Interpolation
Real apps inject dynamic values into strings, a username, a count, a date. This is called interpolation, and i18next handles it with double-curly placeholders.
Add a key with a placeholder to both JSON files. In en-US.json:
{
  "welcome_back": "Welcome back, {{username}}!"
}
In zh-CN.json:
{
  "welcome_back": "欢迎回来,{{username}}!"
}
Then pass the value as the second argument to “t”:
<Text style={{ ...styles.<body, color: '#fff' }}>
  {t('welcome_back', { username: 'Sarah' })}
</Text>
i18next substitutes {{username}} with Sarah at render time. The placeholder name in the JSON must match the key you pass in.
Step 9: Pluralization done correctly
Interpolation introduces a classic bug. Suppose you show a countdown:
{
  "launch_date": "{{count}} day left to launch"
}<Text style={{ ...styles.<body, color: '#fff' }}>
{t('launch_date', { count: 1 })}
</Text>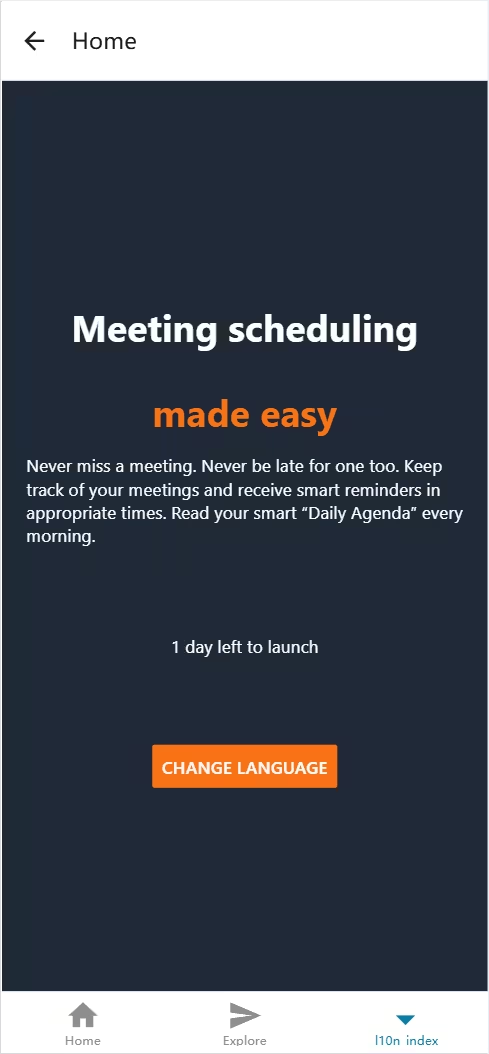
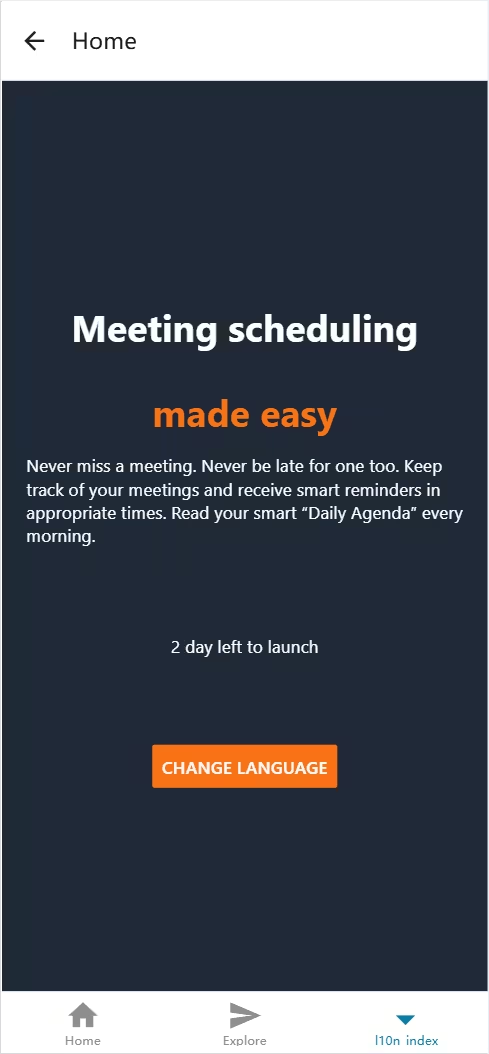
With “count: 1” it reads “1 day left to launch,” correct. But set “count: 2”:
{t('launch_date', { count: 2 })}…and you get “2 day left to launch.” Grammatically wrong.
i18next solves this with plural-category suffixes. When you pass a count, it automatically picks the right key based on the language’s CLDR plural rules. Replace the single launch_date key with the plural forms. In en-US.json:
{
  "launch_date_one": "{{count}} day left to launch",
  "launch_date_other": "{{count}} days left to launch"
}
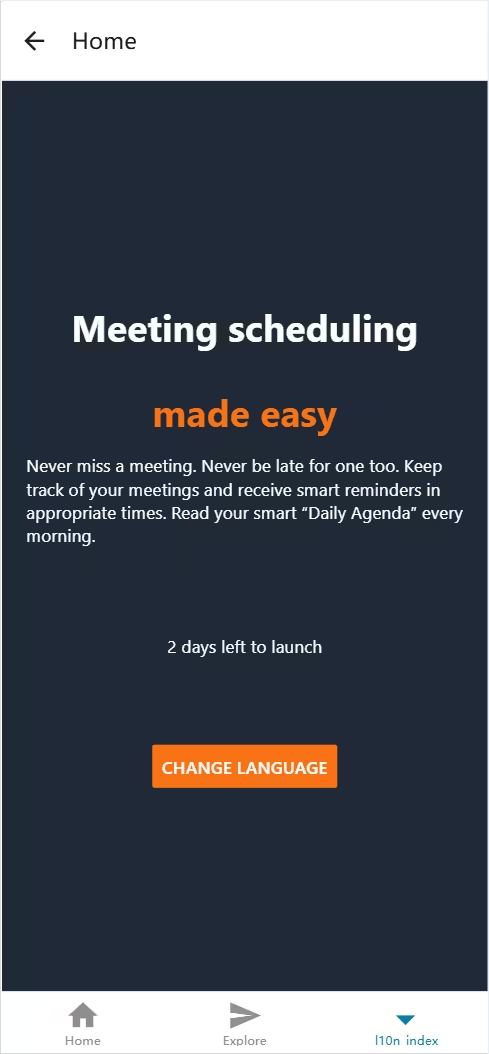
Now count: 1 renders “1 day” and count: 2 renders “2 days.” No code change needed, i18next chooses the suffix for you. One rule to remember: the variable must be named count, and it must be passed in, i18next won’t fall back to a bare launch_date key if you forget it.
Important: not every language pluralizes like English
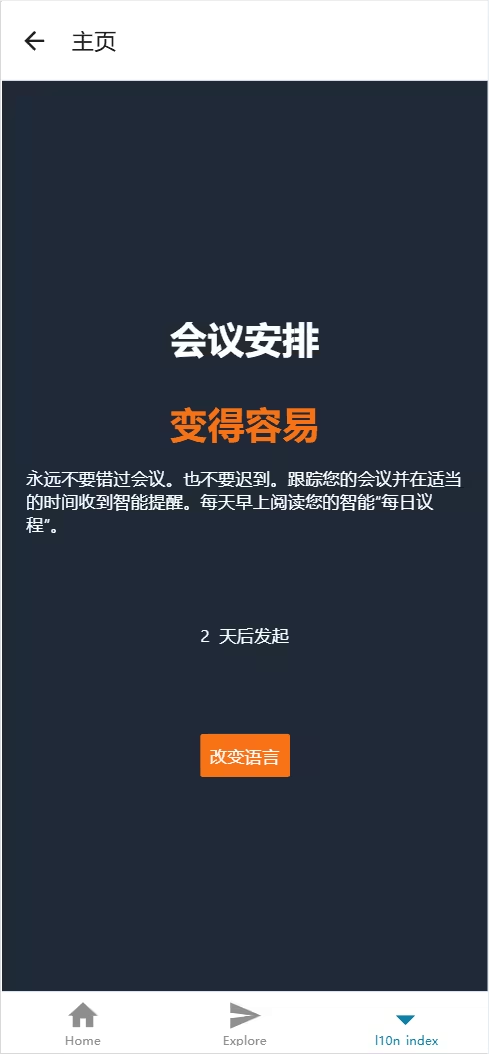
This is where many take the wrong turn. Chinese has no singular/plural distinction. In Chinese, “2 天后发起” is already correct and never changes form. The CLDR rules for zh-CN define only the other category, so for Chinese you only need:
{
  "launch_date_other": "{{count}} 天后发起"
}
Do not add a separate _one form for Chinese and be careful not to introduce stray spacing. An accidental double space (`{{count}} 天后发起`) will render a visibly wrong gap.
Other languages go the other way and need more forms than English. Arabic has six plural categories (zero, one, two, few, many, other); Russian and Polish have several. The lesson: never assume English’s two-form model. Let i18next and CLDR decide and provide exactly the categories each target language defines. See the i18next plurals guide for worked examples, or the Unicode CLDR plural rules chart for the rules per language.
Step 10: Formatting dates, numbers, and currency
Translation is only half of localization. The same value is *written* differently across locales:
- Dates. “01/03/2026” means January 3 in the US (MM/DD/YYYY) but March 1 in the UK (DD/MM/YYYY).
- Numbers. Fifty thousand is “50,000” in the US but “50.000” in much of Europe, and “$49.99” becomes “49,99 €” in many euro locales.
Hard coding these guarantees wrong output for most of your users. The fix is the built-in Intl API, which ships with modern JavaScript engines and is locale-aware out of the box. Create a small lib/format.js helper that reads the active locale from expo-localization:
import { getLocales } from 'expo-localization';

function activeLocale() {
  return getLocales()[0]?.<languageTag ?? 'en-US';
}

export function formatDate(date) {
  return new Intl.DateTimeFormat(activeLocale(), {
    year: 'numeric',
    month: 'long',
    day: 'numeric',
  }).format(date);
}

export function formatNumber(value) {
  return new Intl.NumberFormat(activeLocale()).format(value);
}

export function formatCurrency(value, currency = 'USD') {
  return new Intl.NumberFormat(activeLocale(), {
    style: 'currency',
    currency,
  }).format(value);
}
Use them in a component:
import { formatDate, formatNumber, formatCurrency } from '../lib/format';

// ...
<Text style={{ color: '#fff' }}>Today: {formatDate(new Date())}</Text>
<Text style={{ color: '#fff' }}>Amount: {formatNumber(1234.56)}</Text>
<Text style={{ color: '#fff' }}>Balance: {formatCurrency(1234.56, 'EUR')}</Text>
The same code now renders “January 3, 2026” / “1,234.56” / “€1,234.56” for an American user and “3 de enero de 2026” / “1.234,56” / “1234,56 €” for a Spanish one, automatically.
Tip: You can also wire formatting directly into i18next using its interpolation “format” function, so you write “{{ amount, currency }}” inside a translation string and let i18next route it through Intl. The standalone helpers above are easier to follow when you are learning; the i18next formatter is cleaner at scale.
Step 11: Right-to-left (RTL) language support
Languages such as Arabic, Hebrew, Persian, and Urdu read right to left. If you ship them with a left-to-right layout, the result is confusing and looks broken to native readers, navigation arrows point the wrong way, text aligns to the wrong edge, and icons sit on the wrong side.
React Native exposes I18nManager to control layout direction. The cleanest detection path is to ask expo-localization whether the active locale is RTL:
import { I18nManager } from 'react-native';
import { getLocales } from 'expo-localization';

export function applyTextDirection() {
  const isRTL = getLocales()[0]?.<textDirection === 'rtl';

  if (isRTL !== I18nManager.<isRTL) {
    I18nManager.<allowRTL(isRTL);
    I18nManager.<forceRTL(isRTL);
    // A native restart is required for the new direction to take full effect.
  }
}
Three things to know about RTL in React Native:
- It requires a reload. Calling forceRTL does not re-lay-out a running native app cleanly; the app must restart. In development, reload manually; in production, packages like react-native-restart (or, on Expo, expo-updates “reloadAsync()”) trigger the reload after a language change.
- Use logical layout properties. Prefer marginStart / marginEnd and paddingStart / paddingEnd over marginLeft / marginRight. The “start/end” variants automatically flip with direction, so one stylesheet works for both LTR and RTL.
- Test with pseudo-localization. Before you have real Arabic copy, tools like react-native-pseudo-localization surface layout and truncation bugs early.
Step 12: Context-based translations
Sometimes one source word needs different translations depending on where it appears. The English word “Open” can be a status (“Currently Open”) or an action (“Open File”); other languages often use different words for each. i18next handles this with a context suffix.
In en-US.json:
{
  "open": "Open",
  "open_status": "Currently Open",
  "open_action": "Open File"
}
Call “t” with a “context” option:
<Text>{t('open')}</Text>
<Text>{t('open', { context: 'status' })}</Text>
<Text>{t('open', { context: 'action' })}</Text>
i18next looks for open_status / open_action first and falls back to open if no context match exists. This keeps ambiguous terms accurate across languages without overloading a single key.
Step 13: Taking it to production
Everything above gets you a correct, multilingual app. Shipping and maintaining it across many languages and a real team is a different problem. A few patterns that matter once you scale:
- Type-safe keys. With TypeScript, you can generate types from your JSON so a typo in a translation key is a compile error, not a silent missing string at runtime. See the react-i18next TypeScript guide.
- Namespaces and lazy loading. Split translations into multiple files (e.g. “common,” “checkout,” “settings”) and load them on demand so you are not bundling every string for every screen.
- Over-the-air (OTA) string updates. With expo-updates), you can push corrected copy without a full app-store release.
- Don’t machine-translate and forget. This is the step most engineering-led guides gloss over. Machine translation is a fine first draft, but it routinely mangles tone, idiom, plural rules, gendered forms, and culturally loaded phrasin, and your users notice. Your locales/.json files are the natural hand-off point: ship them to professional translators who localize for tone and culture, run linguistic QA (LQA), and hand the files back ready to merge.
This last point is where a software-only workflow hits its ceiling. JSON management, key syncing, and CI checks are solved problems; quality of meaning in each target language is not something a library can do for you. If you are localizing a product that real revenue depends on (and you would rather your Arabic, Japanese, or German users feel like the app was built for them) that is worth doing with human linguists.
If you would like help turning your extracted strings into culturally accurate, professionally reviewed translations, Transphere does exactly this for software and app teams. Or just reach out with questions, we are happy to help.
Conclusion
You have built a React Native app that detects the user’s language, switches between locales on the fly, formats dates, numbers, and currency to local conventions, pluralizes correctly across languages, supports right-to-left layouts, and disambiguates tricky terms with context. That is a genuinely production-grade internationalization setup, not a toy demo.
The remaining work (and the part that decides whether your localization feels native or merely translated) is the quality of the language itself. Get the engineering right with the steps above, then get the meaning right with real translators. Do both, and your app will feel at home everywhere it ships.